Air Heater


Eberspächer BN2 air heater rebuild and installation...
I have been looking for an air heater for a while, but after having evaluated some brand new solutions (Euro 1,250 for a Webasto petrol air heater) one of my friends forwarded an add for a 60’s Eberspächer BN2 air heater. Only cost me Euro 100 and it does suit the van much better. The heater came with a lot of loose bits and pieces that turned out to be useless, since the heater used to be installed in a T2 pick-up van: definitely not installed in the engine compartment, because none of the parts fitted.
I must have spent ages crawling the internet for Eberspächer BN2 user manuals and/or electrical schematics which reflected my air heater… Eventually I concluded that there are 2 different types of BN2 Eberspächer air heaters: an early model (with a pressure regulator) and a later model (with a volume regulating pump).
Not surprisingly I managed to get my hands on the early (and much less produced) model, which explained my utter confusion when comparing my heater with the ones described in the technical manuals. A volume regulating pump requires a different wiring set-up than a mechanical (with membranes) pressure regulator.
Safety features
Although the Eberspächer BN2 air heater is a product of the early 60’s, it is still a simple but smart piece of technology. It has a couple of nice safety features:
- The vacuum between the combustion chamber and the heath exchange chamber prevents exhaust fumes from entering the interior.
- At the right temperature, a thermal sensor switches off the glow plug, so the air heater will continue to burn on self combustion.
- A thermal safety switch cuts of the fuel supply when the air flowing through the outlet reaches dangerous temperatures.
- A fuel overflow in the combustion chamber will dump excessive fuel during faulty or no ignition.
- When the air heater is switched off, the fan keeps on blowing until all exhaust fumes are out off the system.
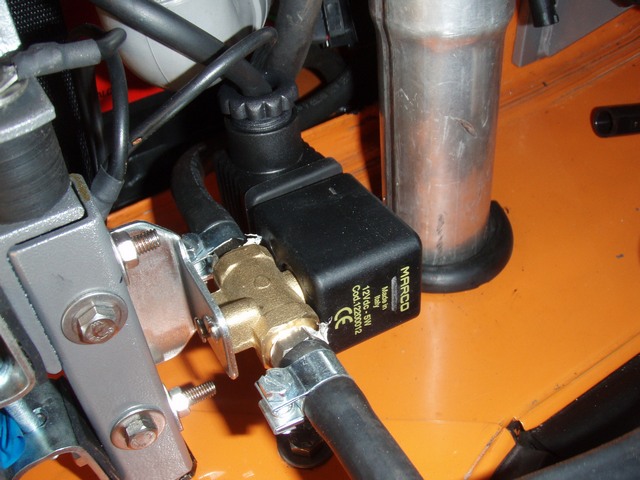
- EXTRA: I added an electronic fuel shut off valve, which cuts of the fuel supply as soon as the heater is shut down. This prevents the air heater from continuing to burn, if anything goes wrong with the fuel pump.
Rebuild
The following things have been done during rebuild of the Eberspächer BN2:
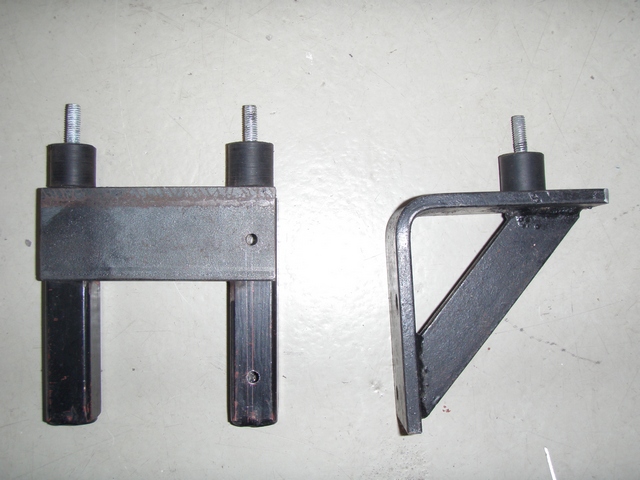
- Welding and fitting of the heater stands.
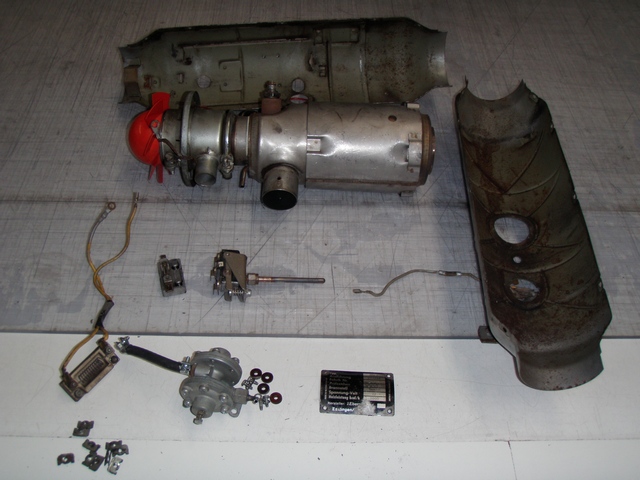
- Complete heater disassembly.
- Inspection of all of the parts.
- Powder coating of all the metal work.
- Complete new wiring and preparation of wiring in the van.
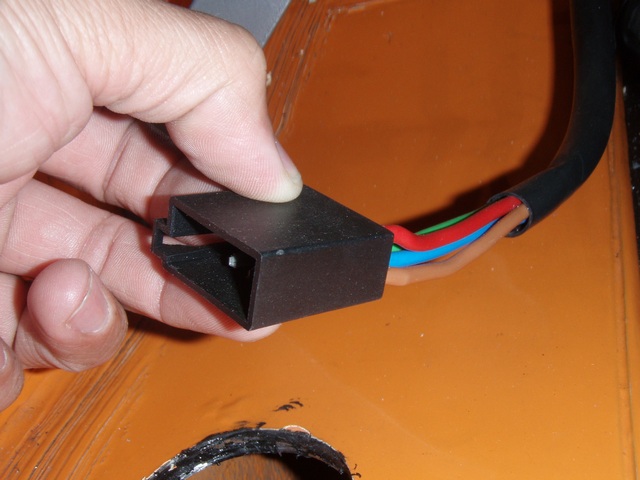
- Installation of a connector between the wiring of the heater and the van for easy disassembly.
I replaced the original Hardi fuel pump by a new Hardi fuel pump to ensure hassle free operation. In addition I replaced all the fuel lines and clamps to prevent any leakage.
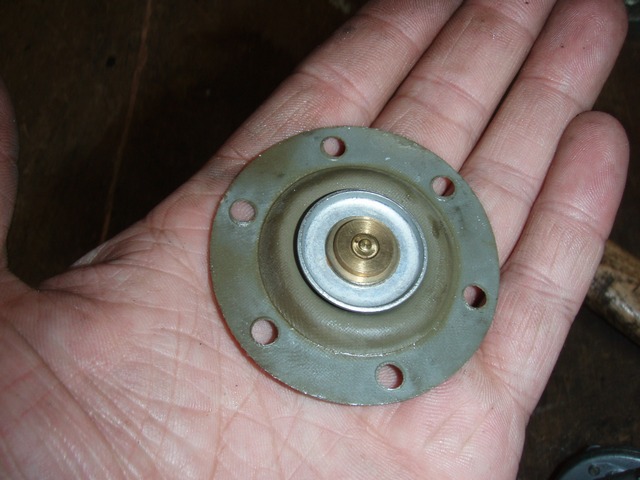
The pressure regulator requires caution during disassembly. The membranes are very fragile parts and should be checked before using the heater: if the membranes are dried out or turned rigid, they require replacement. Eberspächer does not produce spare parts any more for the BN2 model, so the second best thing is to find your self another BN2 air heater and hope for the best… Luckily only one of membranes is susceptible to drying out.
Adjustment
It is good practice to adjust the (early) Eberspächer heater prior to installation in your bus. Connect all the wiring and hook it up on your fuel tank or a jerry can. There are only 2 parts that require adjustment:
Pressure regulator: you will find a little bolt at one side of the regulator which allows you to adjust the opening and shutting of one of the membranes (and thus the pressure of the fuel injected in the heater). To adjust, remove the jet from the heater and aim it in a glass or a measuring jug. Switch on the fuel pump and measure the amount of fuel delivered in one minute. Multiply by 60 and you will have the amount of fuel used in an hour. This should be somewhere in between 0,3 en 0,4 litre. Is your measurement much more or less? Use the adjustment bolt to increase or decrease the volume.
Thermostat: turn the screw next to the connectors to adjust the shut down moment of the glow plug. This should be the moment when the air heater is warm enough to continue operation on self combustion. If the heater is stagnating, the glow plug is shutting down to early. Try to find the sweet spot just after the point of stagnation.
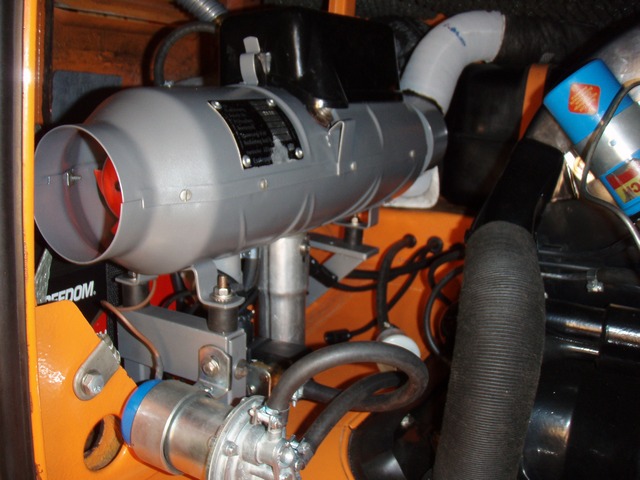
Installation
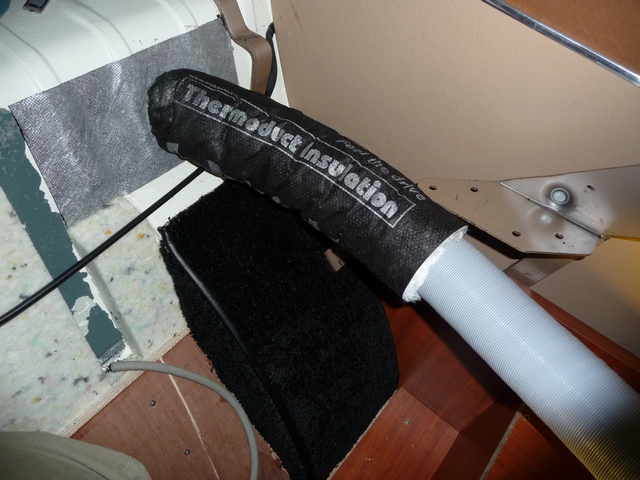
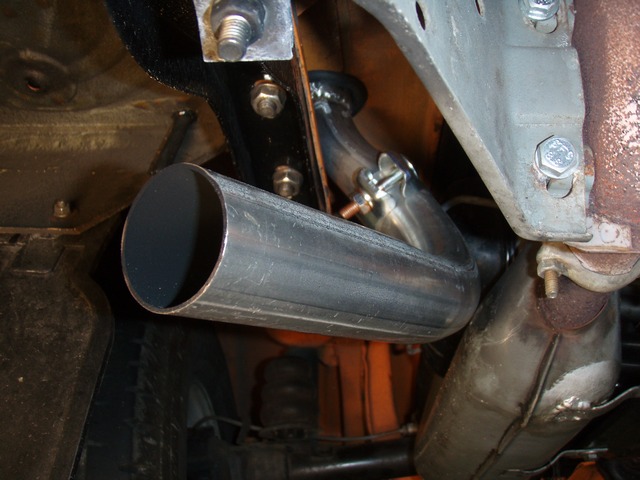
After you have adjusted the heater and all parts have been checked or replaced, you can install it in the engine compartment of your Volkswagen bus. Besides the preparation of the wiring you also require to prepare the fitting of the air inlet and exhaust pipes. Finding a suitable exhaust pipe proved to be a challenge, since it needs to bend around the chassis and it should not block the valve cover.
The solution came in 3 pieces: a 42 millimetre straight pipe, a piece of Mazda 323 exhaust pipe fitted nicely around the chassis and finally a bend pipe to end up next to the engine's exhaust pipe. All fitted with clamps so it can be taken apart if required.
There are plenty of standard solutions to connect the Eberspächer air heater to the interior. I fitted an 80mm to 2x 60mm dividing pipe from Webasto, to split the outlet into 2 separate outlets: one for the left and one for the right hand side of the interior. The 60mm hoses and insulation are also made by Webasto. Make sure you drill two holes of (at least) 65 mm into the engine compartment firewall to make sure you can fit the hoses with insulation. I made two outlets underneath my rear bench to connect the hoses to and to make sure the hot air would come out as low and as much in the centre of the bus as possible for optimal heating.