Upholstery - Part 2

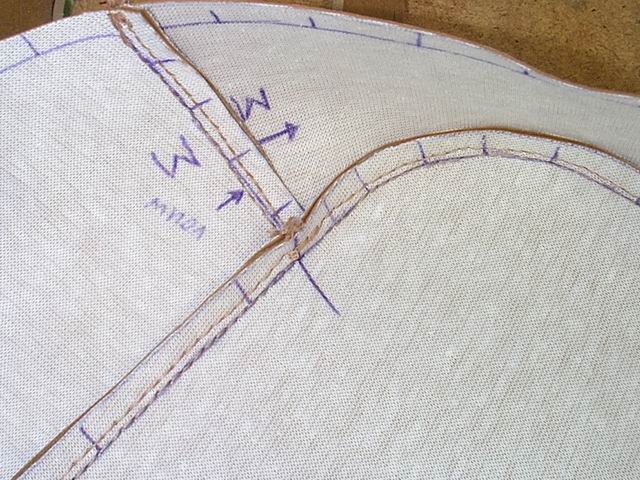


After numerous times of repeating the method as described in Upholstery - Part 1, you should now have a large number of home made puzzle pieces. To prepare the pieces for sewing, use double-sided tape (5 mm) to stick the different parts of fabric together at the seams. Start sticking them together from the middle and work both ways; align the marks you made earlier, bit by bit.
It is very likely that you will find that the marks will not align; half a cm is not an exception. This difference is caused by the loss of tension of the old material when you were cutting the parts loose from each other.
To copy this tension into the new fabric you will have to align the marks you made on the fabric. To do so, bent the material around your finger. Which way, depends on which side you will find the misalignment. In theory it is like being on an ice-skating rink: the inside bend distance is shorter than the distance in the outside bend.
When all marks have been aligned properly, the two pieces can be sewn together. Please note that regular thread cannot be used for sewing vinyl or imitation leather. For the best looking and strongest results use:
- 100% nylon sewing thread (for strength).
- Rough or thicker thread gives a nicer looking seam.
- A thicker needle; imitation leather is a tough fabric and at some instances, you will have to go through several layers.
- If possible use something more professional than a Fisher-Price sewing machine...
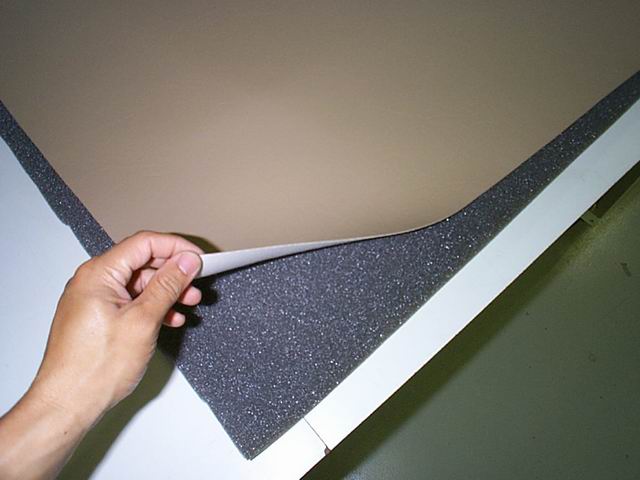
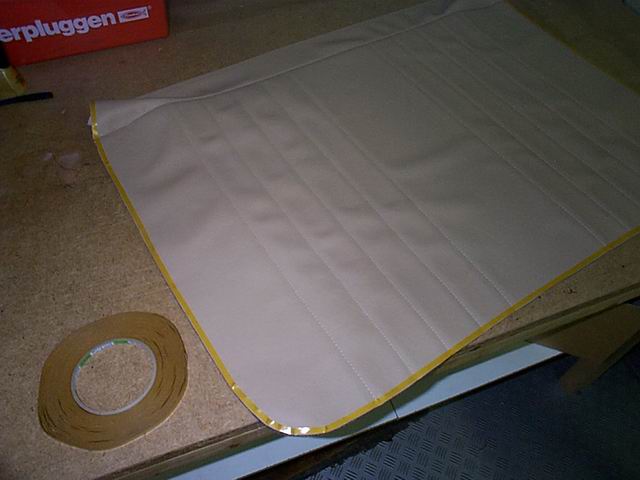
To make it look even better, we're putting stripes over the seats and the back of the seats. To give these stripes a slightly ‘raised’ look, a 5 mm foam layer is glued to the back of the fabric, using spray glue. We chose to use 6 stripes, 5 cm wide each, but of course this is up to your own discretion. Make sure you sew them in the material before copying the model onto the seat and back of the seat.
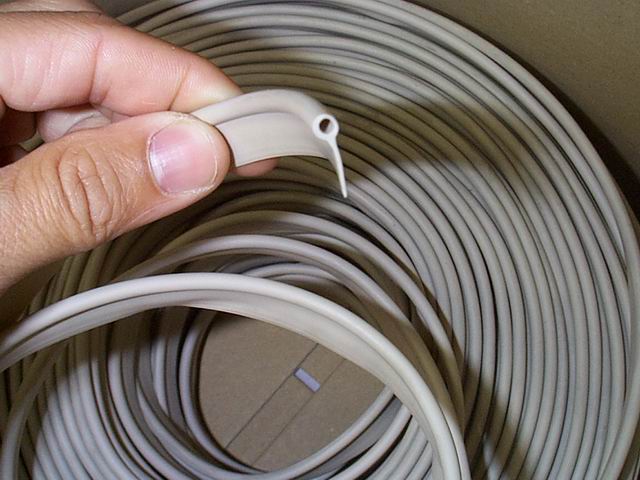
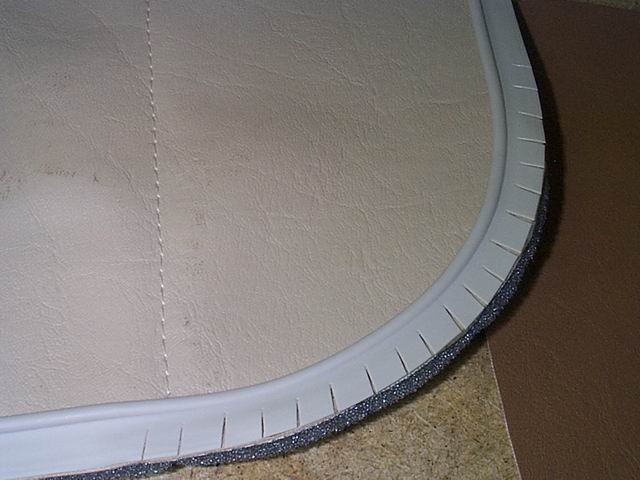
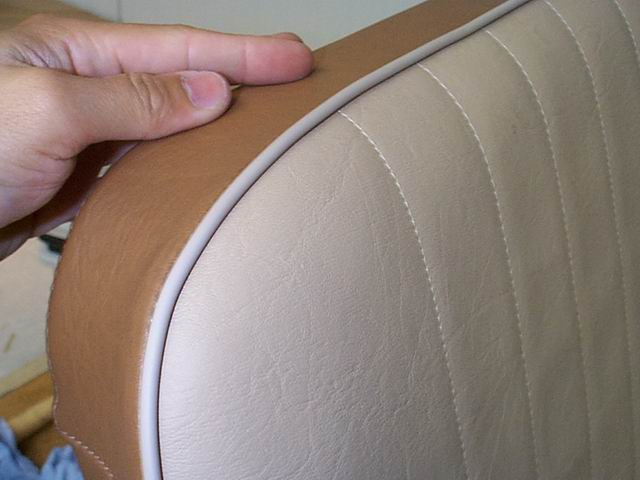
Similar to the original seats, we'll be adding a plastic strip between the seam of the seat and the sides of the seat. This strip is best put in place using double-sided tape to prevent it from going anywhere when sewing it all together. To bend the rigid plastic through the corners, cut little bits out of the plastic strip. Once the plastic strip is in place, continue with the remaining pieces of the seat cover. Again, stick the pieces together using double-sided tape, align with the help of the marks you made on the backside of the fabric; meaning you will have to sew all pieces together inside out!
Before installing the new covers on the seats. Check if the seats are not damaged; holes or bald spots on the bare seat. Fill them up with cotton fibres and glue them to the seat with spray glue.
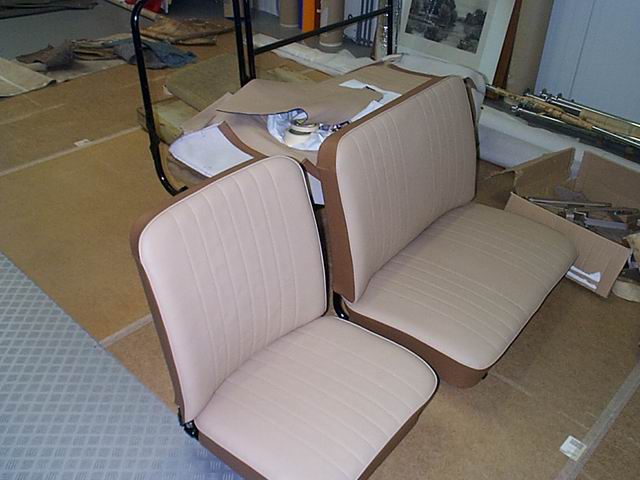
Installation of the new seat covers is done in the reverse order of how you loosened them:
- Start with putting the cover inside out on the seat.
- Align the seams on the original indent visible on the foam.
- Start at the corners, carefully fold them around the seat.
- Work your way around the seat, pulling the cover over the frame bit by bit.
- Tighten using the same methods as encountered when loosening (hooks, clamps, iron wire)
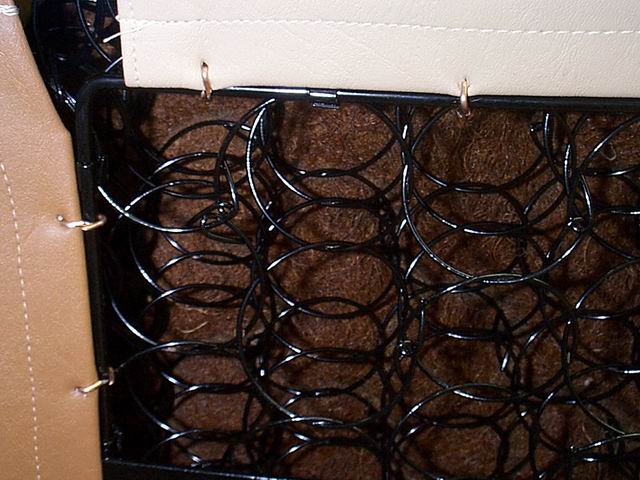
Our seat frames and spring were sandblasted and powder coated, while we were working on the upholstery. The result is stunning and has some additional advantages; no rust will come down from my seats onto my nicely painted van!