Vent Windows


Removing the vent window glass from the frames was not such a big deal three years ago: using a knife to cut through the rubbers and the glass will drop out of the frame. Installing the glass into these fragile frames is something completely different though.
The main problem I ran into while trying to refit the glass was that the thin frame seems to have the annoying habit to bend while trying to push the glass into it. Resulting in the glass not being fully seated in the frame.
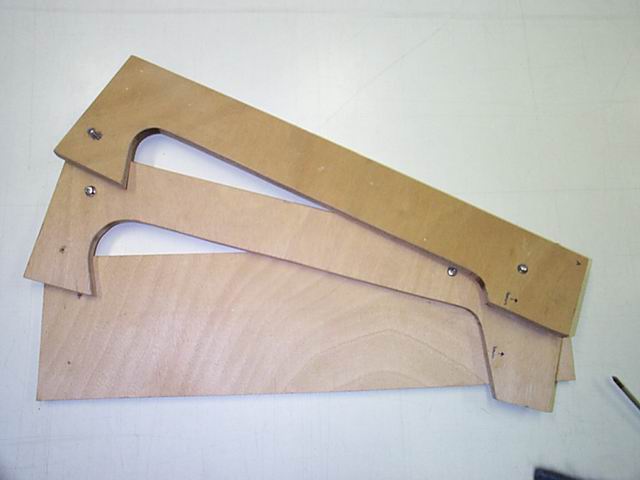
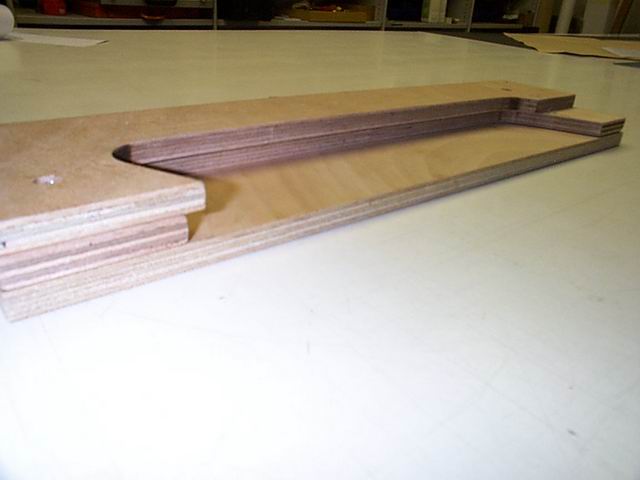
Initially, the solution to this problem seemed rather complicated; some of the old VW workshop manuals showed a complicated tool, that made me give up hope rather than encourage me to get the job done. However, I figured that I could build my own tool with readily available materials, the tool exists of 3 layers of 12 mm thick plywood:
- The middle piece is shaped after the model of the vent window frame; it will hold the frame, preventing it from bending open when installing the glass.
- The 'block' is used to hold the edge of the glass. It will spread the pressure and will protect the glass from shattering when pressure is applied with a vice.
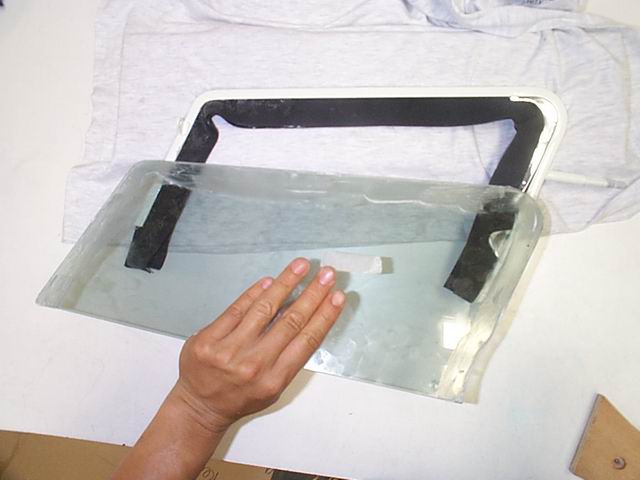
To start fitting the glass, install the middle section onto the bottom plate (I used two screws for easy disassembly). Put a cloth (or as in my case, my t-shirt) in the area where you will lay the vent window frame; this will prevent any damage to those freshly painted frames. Place the window frame in the middle cut-out as illustrated on the photos. Now install the rubber into the frame, using plenty of dishwashing liquid.
After the frame and rubber have been installed, place the last piece on top of the assembly. Note that this top section almost has the same shape as the middle but slightly smaller (ca 5 mm). This will prevents the frame from moving up once you start to apply pressure when you press in the glass.
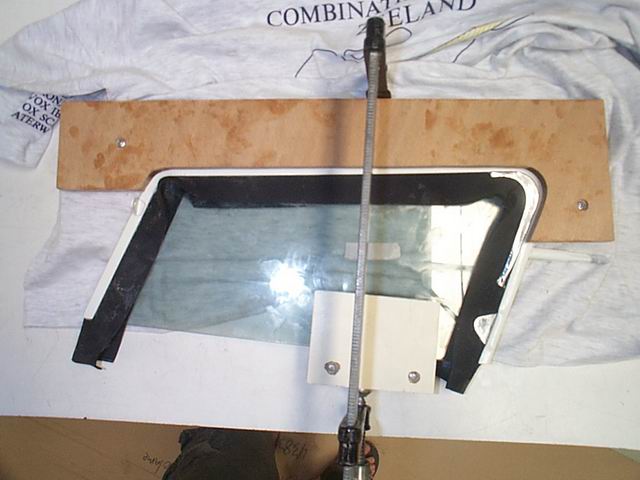
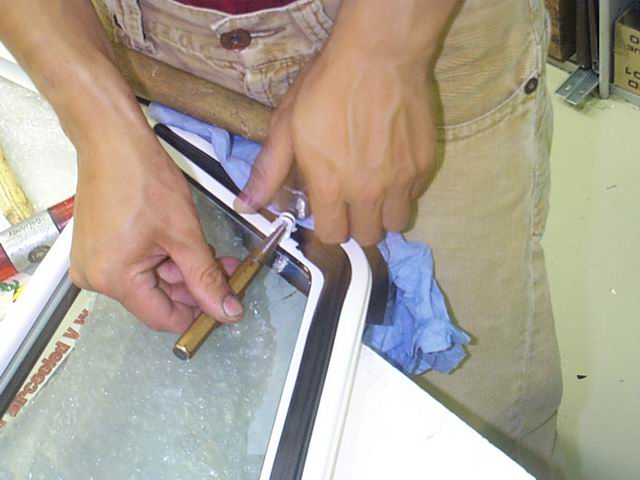
Now that all preparations have been made, generously apply dishwashing liquid to the edges of the glass and carefully push the glass between the rubber and the frame. Place the block to hold the edge of the glass and install the vice. Slowly increase pressure with the vice to slide the glass into the frame. When the glass slants, move the vice and block to the left or right to adjust accordingly.
Belief it or not; my first attempt was a hit! Luckily the thorough preparation paid off after all! Now, before loosening the vice, tighten one more time from top till bottom and check that the glass no longer moves inside the frame. Remove the vent window assembly from the tool and rinse it thoroughly to remove all the dishwashing liquid. Leave the assembly to dry for some hours. After it has dried entirely, cut away the redundant rubber. The piece behind the rain deflector is pretty hard to remove, so good luck with that...
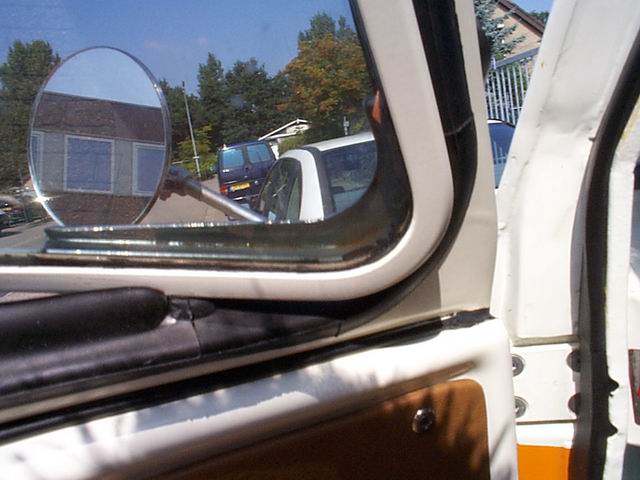
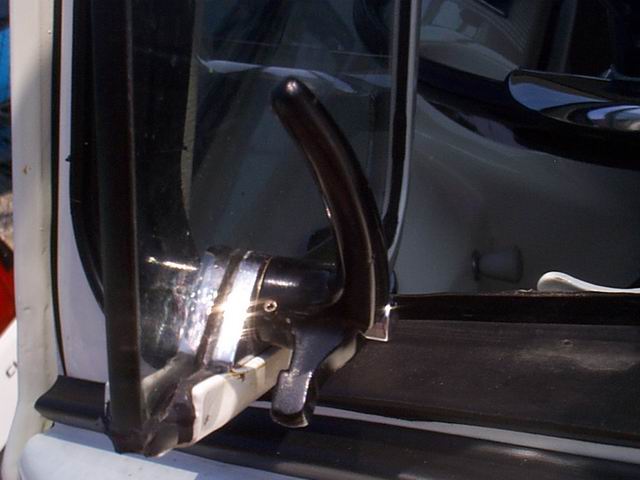
The final step will be to install the vent window into the upper frame of the front doors. Most of the assembly of the rubbers go without saying, some creativity might be required for the upper hinge of the vent window as the rubber I used did not have any pre-shaped holes. Note that the piece of rubber between the door window frame and the vent window (the vertical one) is triangularly shaped and not symmetrical, check if it seals the vent window when you close it.
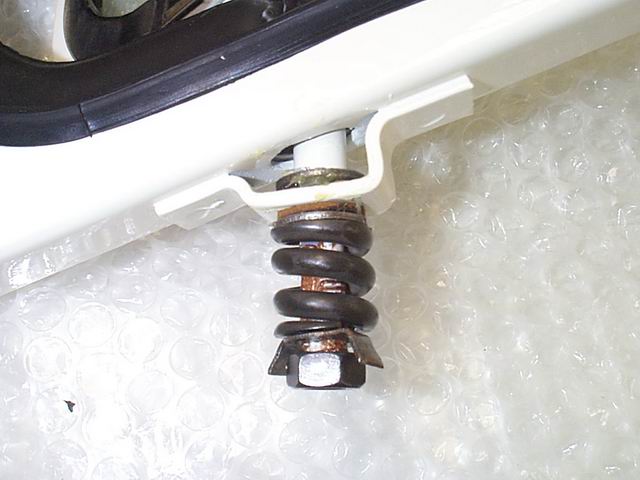
One last point is to pay attention to the right order of the spring, washers and nut when you install the vent window. Double check before you install the rivet at the top hinge, it will save you from trouble… ;-) To finish, I filled the ends of the window frame PU-silicon; leave it to dry and cut away the redundant material for a smooth finish.